Colony Multiplication: 5 Methods in Detail
Brood splits, artificial swarms, flying bee splits, shook swarms and pooled brood nuclei -- each method step by step with pros, cons and practical tips.
Colony Multiplication: 5 Methods in Detail
Targeted colony multiplication is one of the core skills of advanced beekeepers. Whether you want to expand your operation, compensate for losses or channel the swarming impulse into productive outcomes -- choosing the right multiplication method determines your success.
Prerequisites
The optimal time window falls during the swarming season from late April to mid-June. Key factors:
- Drone maturity: sexually mature drones available from mid-May
- Colony strength: parent colonies strong enough to donate bees and brood
- Forage availability: sufficient nectar and pollen for the nucleus to feed itself
- Temperature: warm days (above 20 °C) for the mating flight
Making splits before sufficient drone maturity is a common mistake. Drone brood is started from mid-April, emergence after 24 days, then 12-14 days until sexual maturity. From mid-May onwards enough mature drones are available.
The donor colony should cover at least 8-10 fully occupied frames, have 6-8 brood frames, show no signs of disease and have a low Varroa load.
Equipment Checklist
Varroa Considerations in Colony Multiplication
An often underestimated aspect: every multiplication method has implications for the Varroa load -- both in the split and in the parent colony. Methods that transfer capped brood (brood splits, pooled brood nuclei) also transfer mites. Methods without brood (artificial swarm, shook swarm) offer an ideal treatment window.
This consideration should play an equally important role as effort and success rate when choosing a method. Especially for colonies with elevated mite loads, the combination of multiplication and Varroa management can make the difference between healthy and endangered colonies.
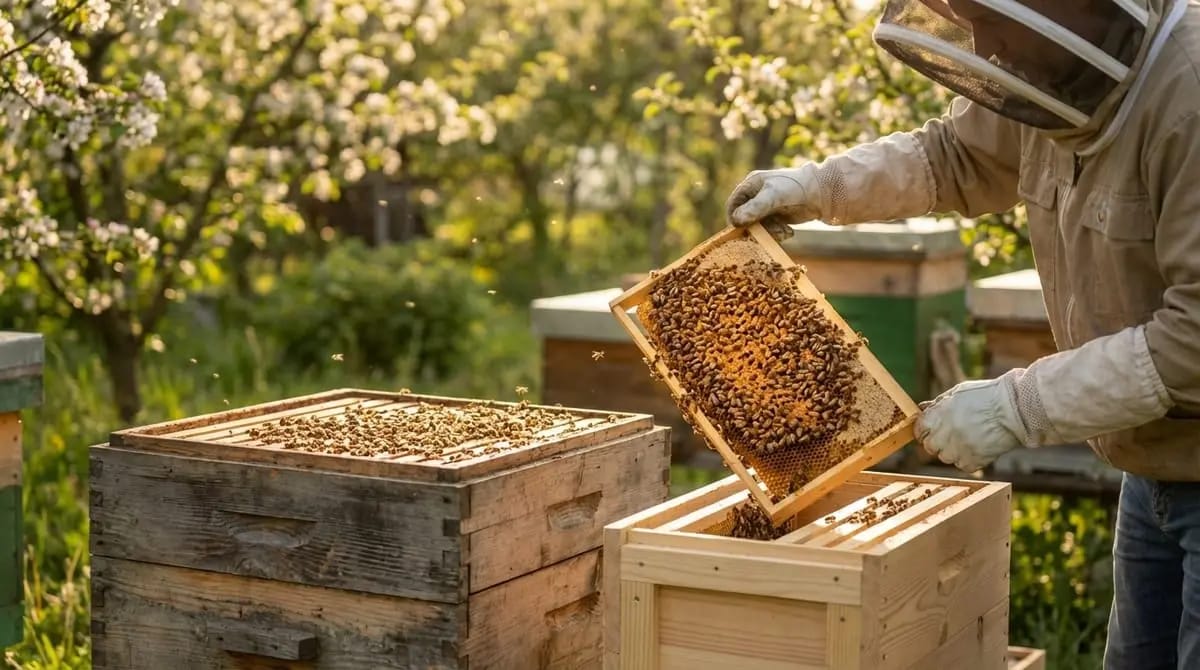
Method 1: The Brood Split (Nucleus Colony)
The brood split is the standard method -- simple, reliable and ideal for planned expansion. Capped brood frames with adhering bees are removed from the parent colony.
Find and secure the queen
The queen must remain in the parent colony. Set her frame aside or use a queen excluder.
Select 2-3 brood frames
Primarily capped brood plus one frame with very young open brood (eggs/larvae under 3 days old) for emergency queen cells. Prefer frames well covered with bees.
Shake in additional bees
Shake bees from 1-2 additional frames into the split. Rule of thumb: include twice as many bees as desired, since flying bees will return to the parent colony.
Add food frame and empty comb
One full food frame (at least 2 kg) on the outside, brood frames in the centre, empty comb/foundation alongside. A total of 5-6 frames.
Transport and open
Move to a location at least 3 km away. Open entrance to 2 cm (robbing protection). Feed immediately with 1:1 sugar syrup.
Check (Day 5-7 and Day 28-35)
After 5-7 days: are 3-8 emergency queen cells present? Reduce excess to 3-5. After 4-5 weeks: check for egg-laying by the new queen.
Adding a mated queen (in a cage with candy plug, 3-5 days) shortens development time by 3-4 weeks and eliminates mating risk entirely. The safest variant.
Method 2: The Artificial Swarm
The artificial swarm simulates a natural swarm: bees without brood are shaken into an empty hive. The key advantage: immediate Varroa treatment is possible.
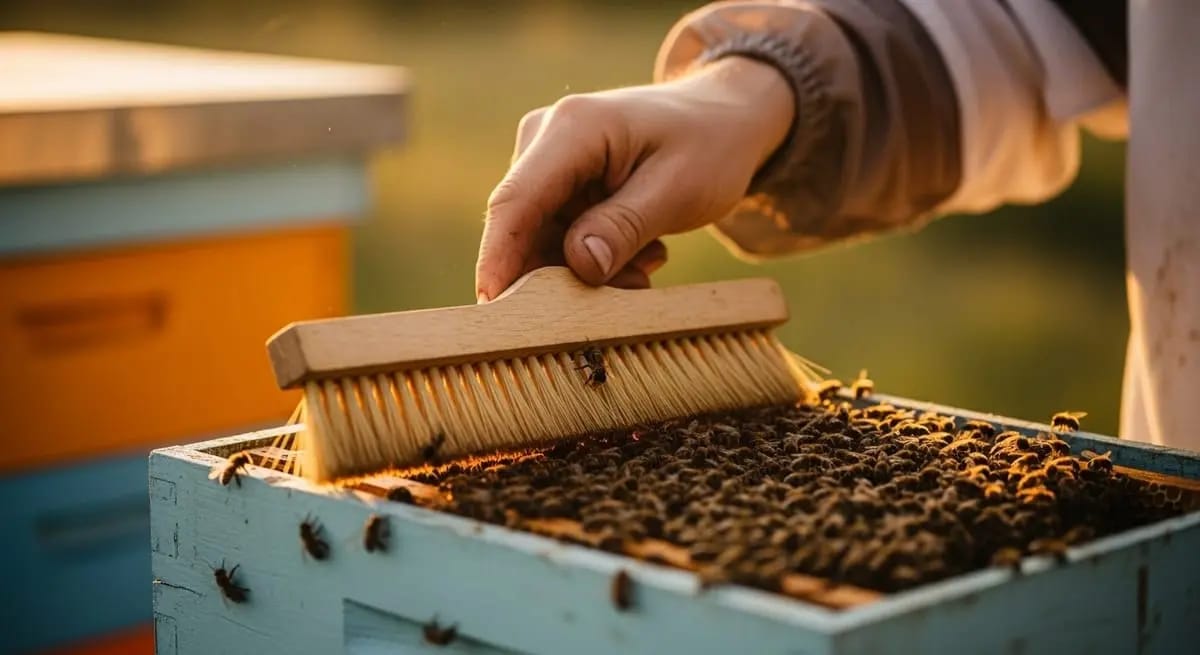
Shake off bees (1.5-2 kg)
Shake bees from 4-6 brood frames into a ventilated swarm box. Do not include the donor colony's queen. When using multiple donors: spray bees with sugar syrup.
Introduce a mated queen in a cage
Introduction cage with candy plug. Acceptance rate in broodless swarms: above 95 %.
Cellar phase (optional, 2-3 days)
Place the swarm box in a dark and cool location (12-15 °C). Spray daily with sugar syrup through the mesh. Increases cohesion and queen acceptance.
Hive and treat
Shake bees onto foundation. Treat with oxalic acid immediately (spray/trickle method) -- all mites are phoretic, efficacy above 95 %. Start intensive feeding (2-3 L/week for 4 weeks).
The combination of artificial swarm + immediate oxalic acid reduces the mite load to near zero. Additionally treat the donor colony's brood frames with formic acid, or melt them down if infestation is high.
Method 3: The Flying Bee Split
The flying bee split uses the homing instinct of forager bees. The parent colony is moved, a new box stands at the old location -- all returning foragers fly into it. The most effective method for swarm prevention.

Set up split hive at the old location
1-2 frames with open brood (eggs!) from the parent colony, one food frame, foundation. Alternatively: introduce a mated queen.
Move the parent colony
At least 2-3 metres to the side or to a different location. The queen stays in the parent colony. All flying bees return to the old location.
Check after 7 days
In the split: emergency queen cells present? In the parent colony: swarming mood broken? The parent colony rebuilds with young bees in 2-3 weeks.
Method 4: The Shook Swarm
The counterpart to the flying bee split: the queen goes with house bees onto foundation at a new location. At the old location, brood frames + forager bees remain and raise a new queen.
Move the queen onto foundation
New hive with only foundation + one food frame. Find the queen, place her on foundation, shake bees from 3-4 frames in as well.
Move to new location (at least 3 km)
The queen starts laying within a few days on fresh comb. Intensive feeding required.
Use the broodless phase for Varroa treatment
For 9-12 days there is no capped brood -- an ideal window for oxalic acid treatment with above 95 % efficacy.
Both are broodless and ideal for Varroa treatment. The difference: with a shook swarm you keep the established, proven queen on residue-free new comb. Ideal for genetically valuable queens.
Method 5: The Pooled Brood Nucleus
The professional method for queen rearing: brood frames and bees from 3-5 colonies produce an especially strong nucleus.

Take brood frames from 3-5 colonies
1-2 frames with capped brood + bees from each. Do not include any queen! Spray bees with sugar syrup to prevent fighting.
Leave queenless for 24 hours
Bees mix and develop a sense of queenlessness. This increases queen acceptance to above 90 %.
Introduce a breeding queen or queen cell
A mated queen in a cage or a capped queen cell. Add at least 2 full food frames.
Brood from multiple colonies carries increased risk. Only use frames from guaranteed healthy colonies. One contaminated frame can transmit American foulbrood to all donor colonies.
Method Comparison
The Mating Period: The Critical Bottleneck
With emergency queen rearing, mating is the critical bottleneck:
- Day 0: Virgin queen emerges
- Day 3-5: Orientation flights
- Day 5-12: Mating flights on warm afternoons (above 20 °C), mating with 12-20 drones within a radius of up to 7 km
- Day 10-14: Onset of egg-laying
An unmated queen has only 3-4 weeks after emergence. If she is not mated (bad weather), she becomes a drone layer -- the colony is lost and must be dissolved or merged.
Care in the First Weeks
- Week 1-2: Do not disturb! Only refill feed. Opening too often can destroy emergency queen cells.
- Day 10-14: First careful check for queen cells
- Day 21-28: Check for egg-laying
- Throughout: Feed 1:1 sugar syrup, reduce entrance to 2-3 cm
- Week 4-8: Add space once the brood nest grows
Common Mistakes in Making Splits
Every multiplication method has its place -- but none replaces the fundamental prerequisites: a strong, healthy donor colony, good timing and consistent aftercare.
Knowledge Check
In the next lesson, you will learn about queen rearing -- from grafting to starter-finisher systems and mating stations.