Hive Hygiene: Prevention Is Everything
Implement comb hygiene, tool cleaning, and wax cycle management properly. Systematic hygiene measures protect your colonies from diseases.
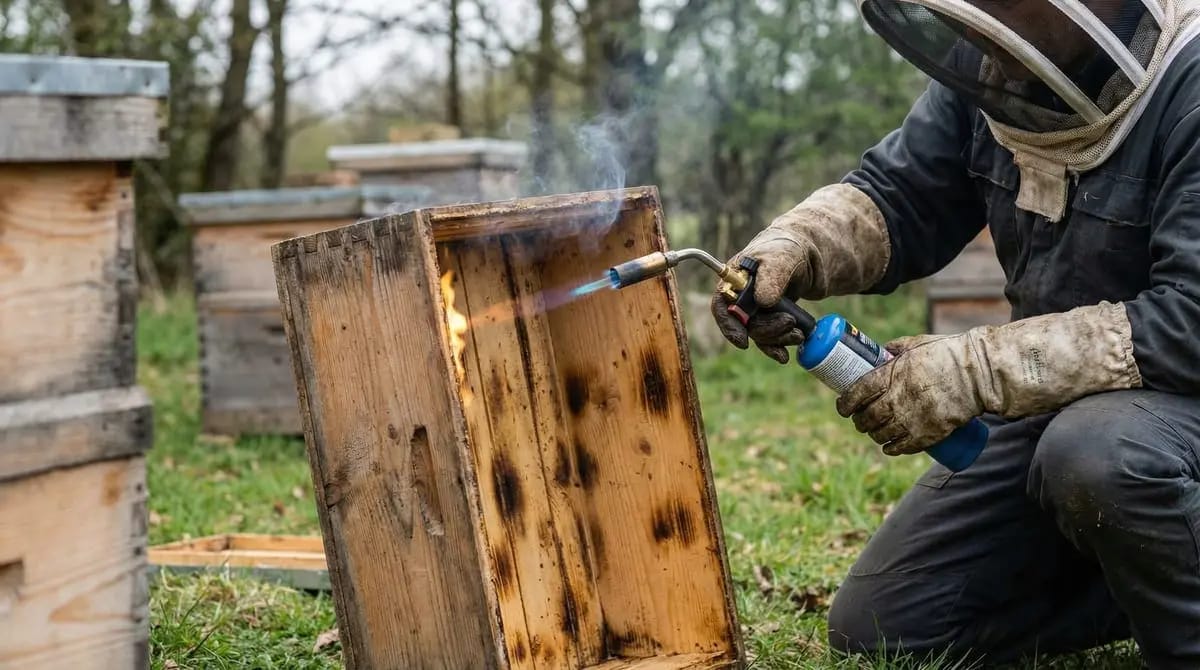
Hygiene can reduce the risk of spreading pathogens within and between apiaries. It does not reliably prevent disease and replaces neither diagnosis nor mandatory action when a notifiable disease is suspected. A suitable apiary concept limits transmission routes through comb hygiene, tool cleaning, and wax traceability.
In this lesson, you will learn the most important hygiene measures that every beekeeper -- whether beginner or expert -- should implement consistently.
Why Hygiene Is So Important for Bees
Bees are naturally very hygienic animals. They remove dead larvae, clean cells before reuse, and seal cracks with propolis. But in modern beekeeping with movable frames, migration between locations, and the exchange of materials between colonies, we create conditions that make it easier for disease pathogens to spread.
Bees possess an innate hygienic behavior: they detect sick or dead brood by smell and remove affected cells. This behavior is genetically determined and varies in strength among different breeding lines. Selection for hygienic behavior is one of the most promising strategies in the fight against brood diseases and Varroa.
The Main Infection Pathways
- Drifting and robbing: Bees from a diseased colony drift into healthy colonies and introduce pathogens
- Comb transfer: Contaminated combs are moved from one colony to another
- Tools: Hive tools, gloves, and bee brushes carry pathogens from colony to colony
- Feed: Contaminated honey or fondant can transmit foulbrood spores
- Wax cycle: Foundation made from residue-laden wax weakens bee health
Comb Hygiene: The Foundation of Bee Health
The comb is the bee's living space -- and simultaneously the greatest hygiene risk. Over the years, cocoon remnants, fecal pellets, pesticide residues, and disease pathogens accumulate in the comb cells. Old, dark combs are the ideal breeding ground for problems.
Why Old Combs Must Be Replaced
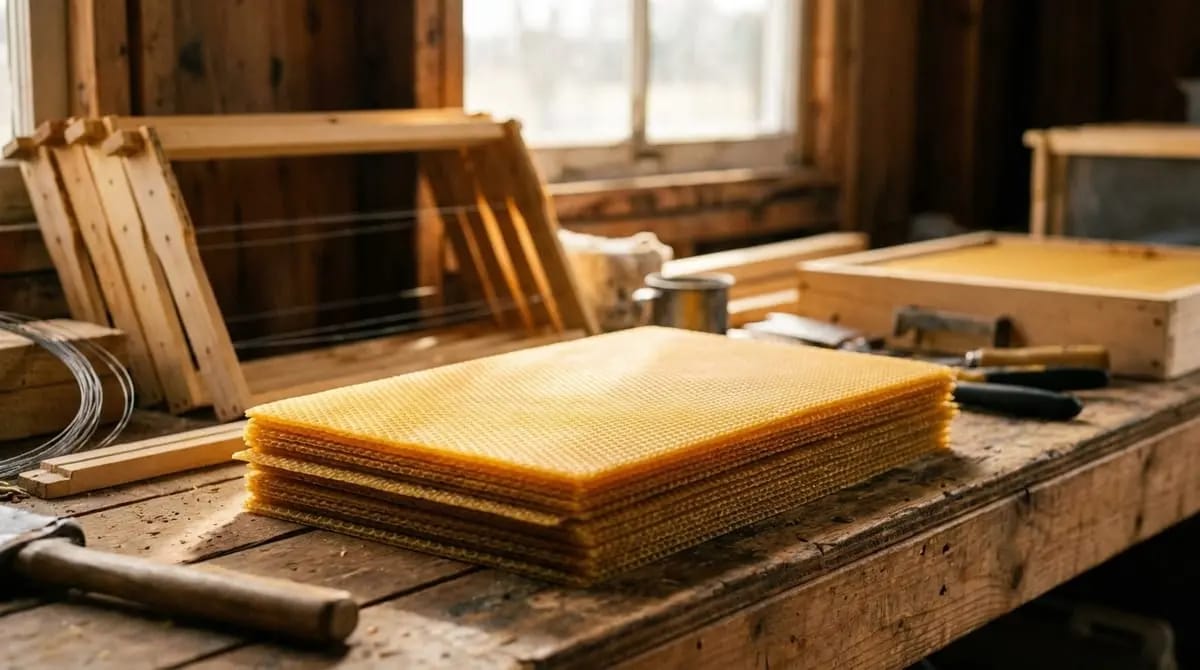
A brood comb gets darker with each brood cycle because the pupae leave cocoon remnants in the cell. After 5-6 brood cycles, the cell is noticeably narrower, the comb almost black. In these old combs:
- The cells are smaller -- the bees that grow up in them are also smaller and weaker
- Pesticide residues accumulate in the wax (fat-soluble substances are stored)
- Foulbrood spores can survive for decades
- Wax moths find ideal breeding sites
- Air circulation in the cells is restricted
Every brood comb should be removed from the colony after a maximum of 3 years (approximately 15 brood cycles) and replaced with a fresh foundation or natural comb frame. Mark new combs with the installation year (e.g., with a thumbtack in a specific color or a year number on the top bar) so you can track the rotation.
Practical Comb Renewal
- 1
Spring: Move old combs to the edge
During the spring inspection, move the oldest, darkest brood combs to the edge of the brood nest (position 1 or the last position). The bees will naturally brood less on these edge combs over the course of the season.
- 2
Place new foundation next to the brood nest
Insert fresh foundation directly next to the active brood nest. The bees will quickly draw them out and use them for brood. Insert 1-2 foundation sheets per inspection, no more -- otherwise the brood nest gets disrupted too severely.
- 3
Harvest: Remove old edge combs
Once the old edge combs are brood-free (no more capped brood), remove them. If they are not yet brood-free, you can place them above a queen excluder -- the brood will emerge there, and the queen cannot lay new eggs.
- 4
Honey super combs: Longer usage
Honey-super combs that are never brooded in can remain usable longer than brood combs. A universal number of years is not evidence-based: replace them according to condition, traceability, and the apiary hygiene plan; remove combs with mould, wax-moth damage, or unclear contamination.
Tool Hygiene: The Underestimated Factor
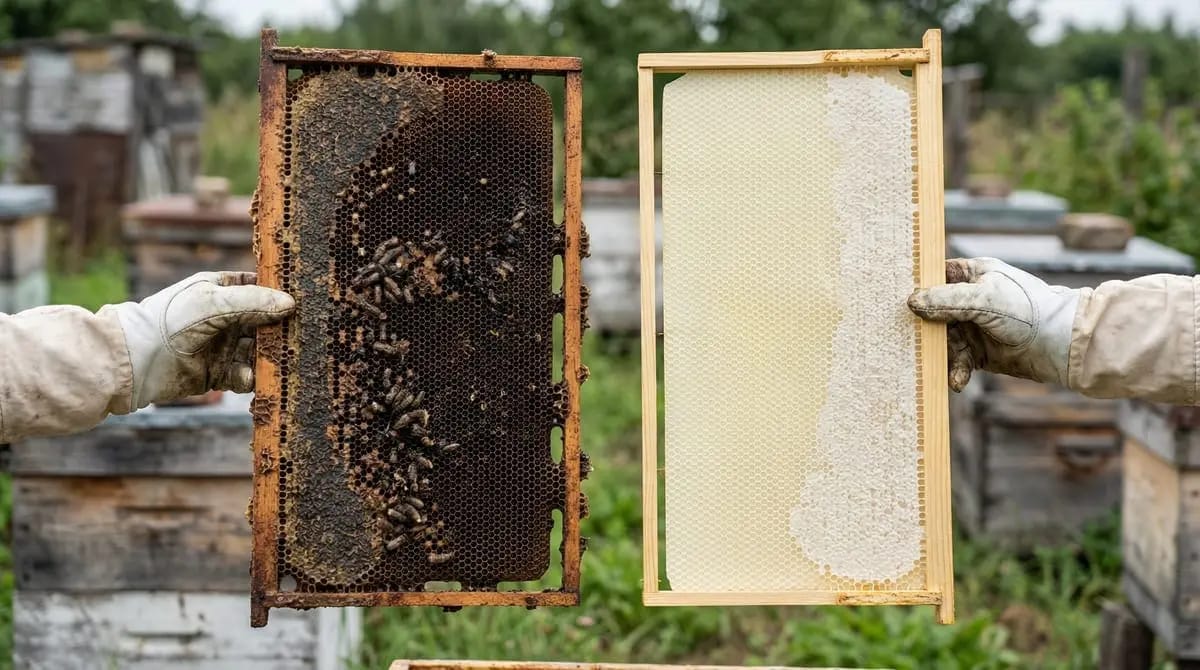
Your tools touch dozens of combs during every inspection and come into contact with propolis, wax, honey, and potentially disease pathogens. Without regular cleaning, tools become a transmission vector between colonies.
Hive Tool
The hive tool is the most-used beekeeping tool and simultaneously the most neglected when it comes to hygiene.
- Apiary-specific hive tool
- Suitable mechanical cleaning aid
- Cloth or paper towels
- After every apiary visit: Wipe off rough wax and propolis buildup with the cloth.
- Before switching to a different apiary: Remove all adherent material mechanically and preferably use a dedicated tool for each apiary.
- Important: 70% isopropanol is not effective against American foulbrood spores. A flame is not a reason to heat metal until it glows.
- When disease is suspected: Stop work, do not move material onward, and contact the responsible veterinary authority. Disinfectant, concentration, temperature, and contact time then follow the official or institute-specific instruction.
- Recommendation: Own at least two hive tools and separate tools by apiary.
Gloves
Leather gloves are difficult to clean and quickly become a germ reservoir. Many experienced beekeepers work with thin latex or nitrile gloves (disposable gloves) that they change after every apiary. This provides the best hygiene protection while allowing good tactile sensitivity. Those who prefer leather gloves should regularly freeze them in the freezer (kills wax moths and larvae) and wipe the exterior with isopropanol.
Bee Brush and Bee Sweep
Bee brushes quickly become contaminated with propolis, wax, and disease pathogens. It is best to use bee brushes made of plastic (not natural hair) that you can clean in hot sodium hydroxide solution or in the dishwasher. Some beekeepers prefer the goose feather, which is easier to clean and crushes fewer bees.
Extraction Room Hygiene
Food hygiene regulations for honey processing vary by country. The principles below are universal, but specific requirements (e.g., registration thresholds, inspection procedures) depend on your national and local regulations. Check with your beekeeping association for details.
Honey regulations and food hygiene regulations set clear requirements for hygiene during honey processing. Even if hobby beekeepers do not need commercial certification in many jurisdictions, the basic principles apply:
Hygiene Checklist for the Extraction Room
Your Own Wax Cycle: Independence and Safety
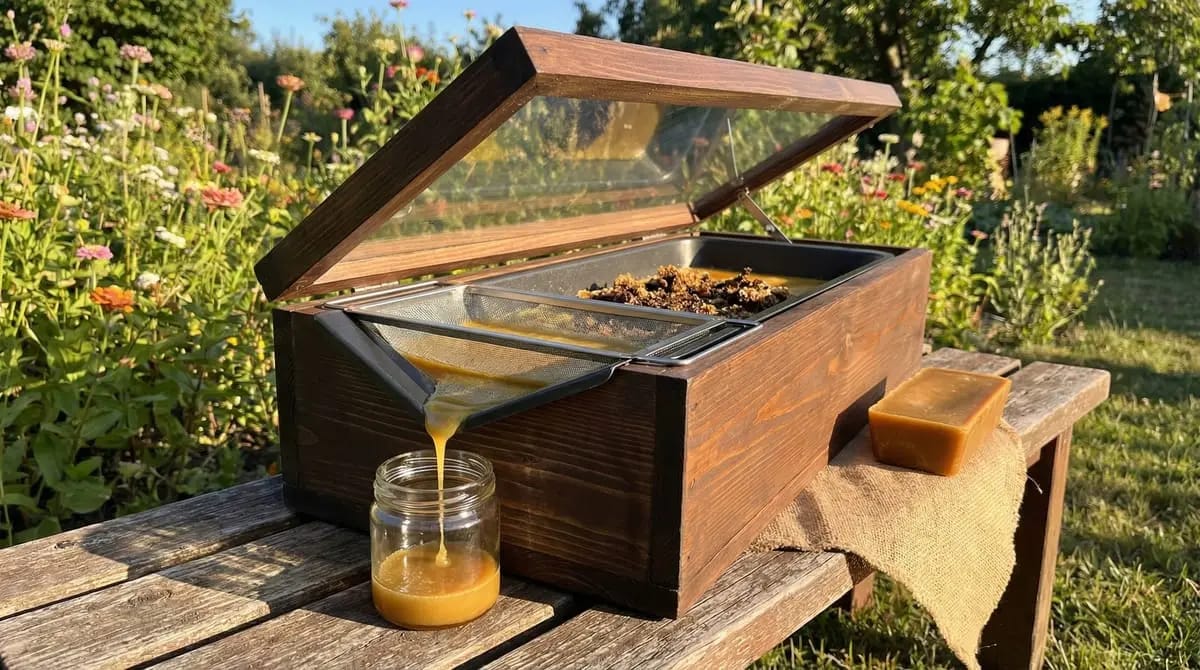
A controlled wax cycle records wax by source and use and keeps processing traceable. Cappings and virgin wax should be processed separately from old brood-comb wax. This improves control but guarantees neither residue nor spore freedom.
- Better traceability: Purchased and own wax remain distinguishable by origin and batch
- Targeted risk control: Residue or spore freedom can be assessed only through suitable process evidence or laboratory testing
- Better acceptance: Bees often draw out foundation made from their own wax more willingly and quickly
- 1
Collect wax
Collect uncapping wax (the purest wax produced), natural comb from the honey super, and wax scraps from drone comb cutting separately. Uncapping wax has the highest quality. Old wax from the brood chamber is more heavily contaminated with residues and should not be used for foundation.
- 2
Clean the wax
Melt the wax in a steam wax melter or solar wax melter. During melting, wax and contaminants separate (cocoons, propolis, pollen). Filter the liquid wax through a fine sieve or cloth.
- 3
Pour a wax block
Pour the cleaned wax into a block. Let it cool slowly -- rapid cooling creates cracks. The bottom of the block often still contains residue (sediment) -- scrape off this layer.
- 4
Have foundation manufactured
Bring your wax block to a foundation processor (many beekeeping associations offer this service) or roll the foundation yourself with a foundation press. Make sure the processor returns your own wax and does not mix it with others.
Commercial wax may be adulterated with paraffin, stearin, or other foreign substances or contain residues. Appearance, smell, and acceptance by bees provide clues at most, not proof. Reliable conclusions require a suitable wax analysis. A controlled own-wax cycle improves traceability but does not remove legacy contamination from that wax.
Cleaning Hive Equipment: Frames, Boxes, and Floors
Boiling and Scorching Frames
- Mechanical cleaning aid
- Cleaning process suitable for the material
- Complete protective equipment specified by the procedure
- Rinse water
- Plan for wastewater and residues
- Remove old combs: Cut the comb out of the frames. Collect old wax separately.
- Mechanically pre-clean: Thoroughly remove propolis, wax, and dirt; this is required before any subsequent process.
- Choose the process: Use only a product or institute protocol suitable for the material and purpose. Do not improvise alkali concentration, temperature, or contact time.
- Protect workers: Use alkali only with complete protection suitable for alkali and heat and with safe work organisation.
- Aftercare: Rinse and dry according to the protocol and check material compatibility. Dispose of wastewater and residues under local rules.
- Limit: For suspected AFB, do not use a routine recipe; leave material in place and contact the veterinary authority.
Boxes and Floors
After thorough mechanical cleaning, even scorching can be an option for suitable wooden boxes; slight surface discolouration is sufficient. Plastic and foam hives cannot be flamed. Use only a validated cleaning or disinfection process compatible with their material.
If American foulbrood is suspected, do not move or reuse anything and notify the responsible veterinary authority immediately. Its order determines examination, cleaning, disinfection, or safe disposal. Depending on the material and official protocol, options may include scorching, a suitable alkali process, or disposal; a universal do-it-yourself recipe is unsafe.
Quarantine for New Acquisitions
Every new colony you add to your stock -- whether purchased, received as a nucleus, or caught as a swarm -- represents a potential infection risk.
Quarantine Checklist for New Colonies
Exchanging equipment, moving combs, and purchasing bees are controllable transmission routes. A risk-based hygiene and quarantine concept is therefore good apiary practice; specific duties depend on the disease situation and official requirements.
Swarm Capture and Hygiene
Catching a swarm is exciting but carries special hygiene risks. You do not know where the swarm came from or what its health status is.
Annual Hygiene Routine
| Timing | Measure | Details |
|---|---|---|
| Spring | Start comb renewal | Move oldest brood combs to the edge, insert fresh foundation |
| Spring | Remove dead bees and debris | Clean bottom board, replace debris tray |
| Summer | Remove old combs | Melt down brood-free edge combs, do not reuse |
| Summer | Clean tools | Scorch hive tool, change gloves, wash bee brush |
| Autumn | Check hive equipment for damage | Repair or replace cracks, moisture damage, loose parts |
| Autumn/Winter | Clean empty boxes | Scorch boxes and floors or boil in sodium hydroxide solution |
| Winter | Melt wax | Melt old wax, clean, and prepare for foundation processing |
| Year-round | Documentation | Record comb age, cleaning measures, and health status in the hive record |
Digital Hygiene Documentation
With Hivekraft, you can digitally record and plan your hygiene measures:
- Comb age tracked per frame (installation year)
- Cleaning measures documented as inspection findings
- Quarantine status flagged for new colonies
- Food ring samples recorded with date and result
- Reminders set for the annual hygiene routine
EU Regulation 2019/6 requires records of veterinary medicines used. Recording hygiene measures as well is useful operational quality assurance, but it is not a general record-keeping requirement under this regulation.
Knowledge Check
In the next lesson, things get serious: we discuss notifiable bee diseases -- what to do in an emergency and how to protect your stock.